You need to know this: I love hot tea. I especially like Chai tea. It all started at a restaurant called P.F. Chang's when my dad ordered a small pot of tea to go with our meal. At that point, I didn't really care for tea, but after that I was hooked. I found a box of India Spice Chai by Celestial Seasonings and ran out in a matter of weeks. When I went to get more, it was gone. None of the stores in my town had any. So I got regular Chai, which was great too. Until about 20 minutes ago, I used Stash to sate my Chai addiction. Now I have my own blend.
Wait... What is Chai? Literally, Chai is Tea. Chai Tea is redundant, meaning "tea tea." Most of us Westerners associate Chai with Masala Chai. Masala Chai is very popular in India. It uses a tea base, a sweetener, milk, and a mixture of "warm" spices called karha. Karha itself has a couple of different components: ground ginger and green cardamom pods, with some other spices mixed in.
So... My Chai! I'll break it down by the 4 parts of Chai.
-Typically, a strong black tea is used as the tea base. I am using Lipton loose-leaf tea since it's what I have on hand. It is a black tea, so it works. I'm not a tea-snob, so I don't really care. It's good to me!
-As a sweetener, I use honey. In addition to being better for you than plain sugar, honey has some health benefits and a wonderfully sweet, earthy taste. To me, Chai should taste earthy and warm. If you don't want to use honey, don't. Use plain white sugar, or brown sugar, or some sort of sweet nectar. Whatever makes you happy.
-Milk. If I could talk my husband into buying whole milk, that's what I'd use. As it is, he wants 2%, so I'm using 2%. Whole milk makes it more rich. You could use condensed milk and it would double as the sweetener. Eew.
-Karha. Say the word. Karha. The sound of it is wonderful. Now imagine the sweet earthynes of ginger and allspice and cloves mixed together with the sharp smell of pepper and fennel. Be right back. I have to go brew another cup.
I like my tea on the spicy-sweet side, and you can never go wrong with cloves and allspice. Those are my favorite spices. So... What is my Karha? I broke tradition and didn't use cardamom pods (I don't know where to get them...). Here's how I did it:
1 Tablespoon fennel
1 teaspoon whole allspice, lightly crushed
12 whole cloves, lightly crushed
1 cinnamon stick, crushed
1/4 teaspoon ground ginger
1/4 teaspoon black peppercorns
2 bay leaves, crumbled
2 Tablespoons loose leaf black tea
Mix everything together and store it in an airtight container. To brew, pour 1 cup of boiling water over 1 teaspoon of the Chai. Steep for 5-ish minutes. Add the honey and top of the teacup with some milk. Sit back and enjoy!
I'm thinking that some dried orange zest would be great in this...
Anyway, I'm off for the night to read some more Song of Ice and Fire. Things are getting good!
-Phwoosh
Showing posts with label recipes. Show all posts
Showing posts with label recipes. Show all posts
Saturday, January 7, 2012

Thursday, December 15, 2011
From the Kitchen: Spring Cove Pancake
 |
| Original recipe from Alli at One Pearl Button |
What you'll need:
1 Tablespoon butter
2 eggs
1/2 cup milk
1/2 cup flour
2 Tablespoons sugar
1/2 teaspoon vanilla
What you'll do:
Preheat the oven to 350*F. In a cast iron skillet, melt the butter. In a bowl, mix together the eggs, milk, flour, sugar, and vanilla until they aren't lumpy anymore. Pour the batter over the butter and bake the whole thing for 20 minutes. Serve with your favorite pancake toppings.
I eat mine plain because they're sweet enough for me without syrup or jelly, and peanut butter doesn't really fit. Next time I go see my grandparents, I'm going to make this for them. They no longer live by the lake, but they're in the same town I grew up in now, and I'll see them in a week or so.
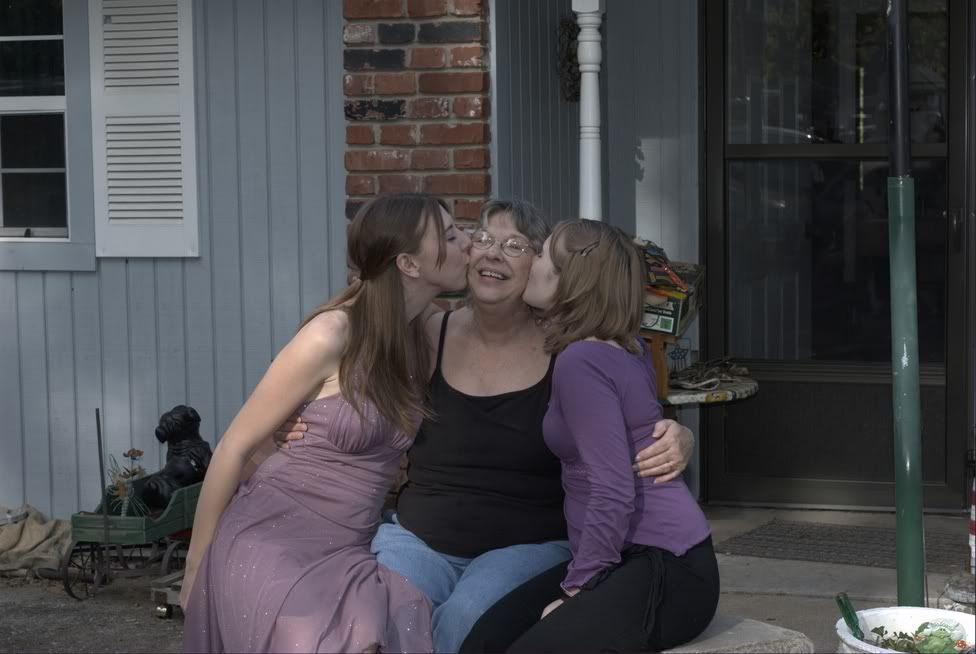
In other news:
Personal information taken out due to Blog changes 7/2013
-Anny
Friday, December 2, 2011
From the Kitchen: Ham Fettuccine
Thanksgiving's not that far behind us and for those of us who had ham in lieu of turkey, the leftovers are beginning to get a bit old. I found this wonderful, cheap way to re-purpose the slabs of ham from the fridge and it tastes wonderful.
What you'll need:
12 oz uncooked fettuccine noodles*
1/4 onion, chopped
2 cloves garlic, minced
3 T butter
3 c cooked, cubed ham
1 1/2 t oregano
1 1/2 t basil
1 1/2 t parsley
1/2 t cayenne
1 c meatless spaghetti sauce**
3/4 c heavy whipping cream
What to do:
Cook and drain the noodles according to package directions. While waiting for that, in a large skillet, saute the onion and garlic in butter until they're tender. Add the ham and herbs and stir/cook for 4 to 5 minutes. Add the spaghetti sauce, bring to a boil, and stir/cook for 2 minutes. Remove from heat, stir in the cream, and toss in the noodles. It doesn't thicken up that much, but the sauce does stick. Serve and enjoy! Makes about 6 servings.
*I had less than 12 oz and snapped my noodles in half. Same amount, but it looked like more.
**We didn't have any pre-made spaghetti sauce (yuck!), so I took a small can of tomato sauce, added enough water to bring it to 1 cup, added some Italian seasonings, garlic powder, salt, pepper, and a dash of paprika. Worked wonderfully!
In other news:
Personal information taken out due to Blog changes 7/2013
That's all for today! I'm out, folks.
-Phwoosh
What you'll need:
12 oz uncooked fettuccine noodles*
1/4 onion, chopped
2 cloves garlic, minced
3 T butter
3 c cooked, cubed ham
1 1/2 t oregano
1 1/2 t basil
1 1/2 t parsley
1/2 t cayenne
1 c meatless spaghetti sauce**
3/4 c heavy whipping cream
What to do:
Cook and drain the noodles according to package directions. While waiting for that, in a large skillet, saute the onion and garlic in butter until they're tender. Add the ham and herbs and stir/cook for 4 to 5 minutes. Add the spaghetti sauce, bring to a boil, and stir/cook for 2 minutes. Remove from heat, stir in the cream, and toss in the noodles. It doesn't thicken up that much, but the sauce does stick. Serve and enjoy! Makes about 6 servings.
*I had less than 12 oz and snapped my noodles in half. Same amount, but it looked like more.
**We didn't have any pre-made spaghetti sauce (yuck!), so I took a small can of tomato sauce, added enough water to bring it to 1 cup, added some Italian seasonings, garlic powder, salt, pepper, and a dash of paprika. Worked wonderfully!
In other news:
Personal information taken out due to Blog changes 7/2013
That's all for today! I'm out, folks.
-Phwoosh
Friday, August 12, 2011
Oh, the thing's I've found...
I've got enough material to blog for a few days at least. Today there will be some pictures, though. I finally pulled the picture of Karen's bag off my camera, and got a picture of the wonderful Sauteed Summer Vegetables. And it's been raining like crazy here for the first time in months, so I have some pictures of the sky to share, too. Also coming today, costume talk. It is supposed to be dress-up day, after all.
First off, The Karen Bag. It's made of denim because she walks everywhere and it needed to be sturdy. She works two jobs, so it needed to be big enough to carry her uniforms. It's blue because that's her favorite color. I now present The Karen Bag.
 |  |
I made it using a bag I made from a pattern my mom had a couple years ago. It's big enough to use as a school bag with a laptop, charger, and textbooks, and small enough to use as a large purse. The only problem is that it's really deep and it has a large opening, which would make it all too easy for pickpockets. I wouldn't carry it at a festival.
Time for something mouth-watering. The vegetable dish.

Oh, how I love this thing. Pardon my messy stove. Admire my collection of cast-iron. And drool at the glory that is nothing but fresh vegetables. For the recipe, click this link.
Rain! Glorious rain! It hasn't really rained here in about a month and a half. The last good rain we had was on my birthday, June 28. A couple days ago, a couple friends in Stillwater contacted me to let me know what was heading this way. Wind, rain, thunder, and lightning. Loss of power, downed trees, and a little fear. I stood on the porch and watched in true Okie style. The photos that follow are in order of occurrence.


One friend sent a picture to me titled Aftermath. It was a picture of all the trees around his place that had lost limbs. I sent him the last one, also titled Aftermath.The sky was absolutely beautiful all through the storm, and when it had blown over, this is what it left behind in the sunset. We've been having weather like this for the last few days now.
And now for the actual Friday report: I'm getting a lightsaber! More specifically, I'm getting this saber. Sorry. It won't let me post an image of it. I'll get you one when it gets here, which might be today or tomorrow. Anyway... It's my birthday present, precious. I need a costume for it. There's nowhere to wear it 'cept conventions and Halloween, really, but that works for me. And it gives me practice modding patterns. See, I'm not going with the pattern-book costume Jedi mess for me. I want to still look like a female. I don't want the long skirt business, either. After a long-ish search, I found this:
 |
| Character design by commander-13 |
Very close to what I want! The top's a bit too racy for me, and I'll be wearing it mostly in colder weather (Halloween will be it's debut), so I figured I'd add another layer. A long sleeved shirt underneath should do well. Off to the pattern stash! For the under-layer, I found McCall's 7899, printed in 1995. I then looked at it again and discovered that for the tunic, the same pattern would work! I just use some different pieces and lengthen it, leave the sides open for the ties I want, and ta-da!
 |
| Tops A and F for the top half of the Jedi costume. |
And for the pants, I'm using Simplicity 8186 printed in 1998. They've got pockets and they are tight enough to show I'm a woman, and loose enough to move around in. I haven't yet decided if I'm going to make anything with a hood or not. An asymmetrical mini-cape would be fun, I think.
Now I think I'm done for the day. There's still a lot I want to blog about, though. My experiences with Molten Front dailies, the tiered skirt measurement generator I found yesterday, my pick-nick dress, and the pictures of my new house dress that I haven't taken... Those things will have to wait, though. Now it is time for caffeine and an egg.
-Anny
Tuesday, August 2, 2011
From the Kitchen: Sauteed Summer Vegetables
It's summertime, which means that vegetables are coming up. Oh, man are they coming up. Probably not here, but the local Wal-Mart has some good ones from somewhere right now. Josh and I went to pick up some sandwich stuff and came home with a bag full of yummies. Squash, a tomato, some green beans, a few onions... And all of it went into my latest creation. This one's all me, too.
You will need:
1 small onion, sliced
1 T olive oil
1 medium squash, cubed
1 clove garlic, minced
1 handful green beans, cut into 1" segments
1 tomato, gutted and cubed
1/4 teaspoon basil
1/4 teaspoon salt
1/8 teaspoon pepper
What you'll do:
Saute the onions in the olive oil until they're tender. Add everything else, lower the heat, and simmer until the vegetables are tender, too.
Makes 2 servings
Yeah. It's that easy. I'm thinking about eating the second serving right now, to be honest. Sooooo good! Next time I make some I'll throw up a picture, 'cause it's pretty too. All the color!
I'll also put up pictures of the Karen Bag. They're still on my camera, right before the pictures of the fire that I've already thrown up. And maybe I'll get some pictures of my new house dress!
So my parents came to visit on Friday and my mom brought a bag of trims with her for me. As she carried it in, I saw a wad of orange fabric on top. And not just any orange; burnt orange. I. Hate. Burnt. Orange. Turns out it was a dress with some gaudy embroidery all over the front and it's shaped like a potato sack. There were ties in the back, though, so that wasn't so bad. I put it on the next morning. Keep in mind: Orange, potato sack, gaudy embroidery. Add to that list: too short to wear beyond the front door. This shapeless thing has nothing going for it! At all! I'm making another.
That's right, I've completely lost my mind. I love it! I'm wearing the orange one right now. And eventually I'm going to make a How to Recreate a Shapeless Garment thing and put it here, too.
The new one is, of course, purple. Instead of the tacky trim around the bottom but not the hem, I chose some black crocheted lace and used that around the hem. One one of the front corners (there's also scandalously high slits =P) I'm embroidering some cogs and a cool steampunk-y swirly thing, compliments of Urban Threads.
Personal information taken out due to Blog changes 7/2013
I started playing Minecraft. It's super-addictive until you get your house the way you want it and landscape your yard to perfection. Then it's boring. I got bored, which means that I spent a week mining for stuff and finding stuff and building a small castle and some waterfalls. All done. I'm actually a little bored with games. Am looking forward to Skyrim, though. Skyrim is the latest in the Elder Scrolls game line. While I missed out on Oblivion, I'm super-excited for Skyrim. Morrowind was just too amazing and I wish I could find my copy so I could get sucked back into that.
Games, food, sewing, jobs... I think I've covered everything! And now it's off to bed, off to bed...
-Anny
You will need:
1 small onion, sliced
1 T olive oil
1 medium squash, cubed
1 clove garlic, minced
1 handful green beans, cut into 1" segments
1 tomato, gutted and cubed
1/4 teaspoon basil
1/4 teaspoon salt
1/8 teaspoon pepper
What you'll do:
Saute the onions in the olive oil until they're tender. Add everything else, lower the heat, and simmer until the vegetables are tender, too.
Makes 2 servings
Yeah. It's that easy. I'm thinking about eating the second serving right now, to be honest. Sooooo good! Next time I make some I'll throw up a picture, 'cause it's pretty too. All the color!
I'll also put up pictures of the Karen Bag. They're still on my camera, right before the pictures of the fire that I've already thrown up. And maybe I'll get some pictures of my new house dress!
So my parents came to visit on Friday and my mom brought a bag of trims with her for me. As she carried it in, I saw a wad of orange fabric on top. And not just any orange; burnt orange. I. Hate. Burnt. Orange. Turns out it was a dress with some gaudy embroidery all over the front and it's shaped like a potato sack. There were ties in the back, though, so that wasn't so bad. I put it on the next morning. Keep in mind: Orange, potato sack, gaudy embroidery. Add to that list: too short to wear beyond the front door. This shapeless thing has nothing going for it! At all! I'm making another.
That's right, I've completely lost my mind. I love it! I'm wearing the orange one right now. And eventually I'm going to make a How to Recreate a Shapeless Garment thing and put it here, too.
The new one is, of course, purple. Instead of the tacky trim around the bottom but not the hem, I chose some black crocheted lace and used that around the hem. One one of the front corners (there's also scandalously high slits =P) I'm embroidering some cogs and a cool steampunk-y swirly thing, compliments of Urban Threads.
Personal information taken out due to Blog changes 7/2013
I started playing Minecraft. It's super-addictive until you get your house the way you want it and landscape your yard to perfection. Then it's boring. I got bored, which means that I spent a week mining for stuff and finding stuff and building a small castle and some waterfalls. All done. I'm actually a little bored with games. Am looking forward to Skyrim, though. Skyrim is the latest in the Elder Scrolls game line. While I missed out on Oblivion, I'm super-excited for Skyrim. Morrowind was just too amazing and I wish I could find my copy so I could get sucked back into that.
Games, food, sewing, jobs... I think I've covered everything! And now it's off to bed, off to bed...
-Anny
Thursday, July 21, 2011
From the Kitchen: Honey Cake (+ fire pictures)
Oh, my, how I do love honey. Sticky and sweet and soooo good! I'll give you the recipe first, and then if you want you can keep reading to hear about how the last couple weeks have been. There will be pictures of fire if you do!
No picture of the cake, though. It's not too impressive to look at, and I was much to excited to start eating it when it came out of the oven. It's sweet and earthy and moist and crumbly and everything I love about cake in one wonderful bite. Cloves and cinnamon and allspice and honey and brown sugar and oh dear... I think I'll have to go have another slice!
What you'll need:
3 1/2 cups flour
1 Tablespoon baking powder
1 teaspoon baking soda
1/2 teaspoon salt
4 teaspoons cinnamon
1/2 teaspoon ground cloves
1/2 teaspoon ground allspice
1 cup vegetable oil
1 1/4 cup honey
1 1/2 cup sugar
1/2 cup brown sugar
3 large eggs
1 teaspoon vanilla
1 cup strong chai tea*
1/2 cup orange juice
What you'll do:
Preheat the oven to 350 degrees Fahrenheit and grease 2 9'' round cake pans. Set those aside. In a large bowl, whisk together the flour, baking powder, baking soda, salt, cinnamon, cloves, and allspice. Make a well in the center and add the vegetable oil, honey**, sugar, brown sugar, eggs, vanilla, tea, and orange juice. Mix together, making sure to get all of the dry stuff from the bottom, until it's no longer lumpy. It'll be a bit stiff for a batter; consider using a mixer of some sort. Spoon the batter into the cake pans and bake in the middle of the oven for around 45 minutes***. Let it set 15 minutes before removing it from the pan. Serve! And again... and again... and again...
*Chai tea - I poured 1 cup boiling water over 2 chai tea bags and let it steep for around 5 minutes. Worked great.
**Measuring out the oil before the honey ensures that the honey comes out of the measuring cup without a lot of mess. I also guessed on the 1/4 cup part, so that didn't get measured. Just pour some in. It'll be fine.
***My oven is a beast and I ended up only baking it for 35 minutes. Adjust time as needed.
Personal information taken out due to Blog changes 7/2013
I, for one, thought Transformers: Dark of the Moon was awesome. It was full of explosions and conspiracy and robots, which is what a summer movie is supposed to be. I was sad they killed Ironhide, and elated when Optimus killed Megatron. The only thing I didn't like about it was that the first scene in the modern world was a panty-shot of the whiny kid's new girlfriend. They could have left that out.
But it's going to be another year and a half before anything even has a chance of beating the final installment of the Harry Potter movies. Have you SEEN it? Gah! Just... Oh, man. After they butchered Half Blood Prince, I was afraid of watching Deathly Hallows part 1. And after the wonderful movie that was part 1, I was terrified that part 2 was going to be nothing but a battle. It was, totally, but it had everything!
<<SPOILER ALERT!>>
McGonagall called the castle to life, Molly killed Bellatrix, Dumbledore was at the train station with the creepy Voldy-thingy, Nevill killed Nagini, Fred died... They even had the part about Snape and the pensieve! And it showed Snape's patronus! EEEEEEEEEE! Sure, the duel between Molly and Bellatrix wasn't that epic, and the resurrection stone wasn't part of the ring that Dumbledore destroyed, and they left out the attack of the house elves and Grop, and Goyle was a black kid, but let's face it... The movie wasn't about Bellatrix and Molly, at least Harry got the resurrection stone, they left out everything about S.P.E.W., Hagrid was hardly in this one so how could we ecxpect them to put in his brother?, and no one cared about Malfoy's goons anyway.
<<End Spoilers>>
It was a wonderful movie, and everyone should go see it at least twice.
Personal information taken out due to Blog changes 7/2013
So yeah. That's what I've been up to. I'll post some about the adventures of my new warlock, my endeavors at getting a new flying mount on Phwoosh, any other new recipes I have tried and haven't posted (can't think of any, though), and hopefully some crafts when we get a little more settled in.
It's good to be back,
Anny
No picture of the cake, though. It's not too impressive to look at, and I was much to excited to start eating it when it came out of the oven. It's sweet and earthy and moist and crumbly and everything I love about cake in one wonderful bite. Cloves and cinnamon and allspice and honey and brown sugar and oh dear... I think I'll have to go have another slice!
What you'll need:
3 1/2 cups flour
1 Tablespoon baking powder
1 teaspoon baking soda
1/2 teaspoon salt
4 teaspoons cinnamon
1/2 teaspoon ground cloves
1/2 teaspoon ground allspice
1 cup vegetable oil
1 1/4 cup honey
1 1/2 cup sugar
1/2 cup brown sugar
3 large eggs
1 teaspoon vanilla
1 cup strong chai tea*
1/2 cup orange juice
What you'll do:
Preheat the oven to 350 degrees Fahrenheit and grease 2 9'' round cake pans. Set those aside. In a large bowl, whisk together the flour, baking powder, baking soda, salt, cinnamon, cloves, and allspice. Make a well in the center and add the vegetable oil, honey**, sugar, brown sugar, eggs, vanilla, tea, and orange juice. Mix together, making sure to get all of the dry stuff from the bottom, until it's no longer lumpy. It'll be a bit stiff for a batter; consider using a mixer of some sort. Spoon the batter into the cake pans and bake in the middle of the oven for around 45 minutes***. Let it set 15 minutes before removing it from the pan. Serve! And again... and again... and again...
*Chai tea - I poured 1 cup boiling water over 2 chai tea bags and let it steep for around 5 minutes. Worked great.
**Measuring out the oil before the honey ensures that the honey comes out of the measuring cup without a lot of mess. I also guessed on the 1/4 cup part, so that didn't get measured. Just pour some in. It'll be fine.
***My oven is a beast and I ended up only baking it for 35 minutes. Adjust time as needed.
Personal information taken out due to Blog changes 7/2013
I, for one, thought Transformers: Dark of the Moon was awesome. It was full of explosions and conspiracy and robots, which is what a summer movie is supposed to be. I was sad they killed Ironhide, and elated when Optimus killed Megatron. The only thing I didn't like about it was that the first scene in the modern world was a panty-shot of the whiny kid's new girlfriend. They could have left that out.
But it's going to be another year and a half before anything even has a chance of beating the final installment of the Harry Potter movies. Have you SEEN it? Gah! Just... Oh, man. After they butchered Half Blood Prince, I was afraid of watching Deathly Hallows part 1. And after the wonderful movie that was part 1, I was terrified that part 2 was going to be nothing but a battle. It was, totally, but it had everything!
<<SPOILER ALERT!>>
McGonagall called the castle to life, Molly killed Bellatrix, Dumbledore was at the train station with the creepy Voldy-thingy, Nevill killed Nagini, Fred died... They even had the part about Snape and the pensieve! And it showed Snape's patronus! EEEEEEEEEE! Sure, the duel between Molly and Bellatrix wasn't that epic, and the resurrection stone wasn't part of the ring that Dumbledore destroyed, and they left out the attack of the house elves and Grop, and Goyle was a black kid, but let's face it... The movie wasn't about Bellatrix and Molly, at least Harry got the resurrection stone, they left out everything about S.P.E.W., Hagrid was hardly in this one so how could we ecxpect them to put in his brother?, and no one cared about Malfoy's goons anyway.
<<End Spoilers>>
It was a wonderful movie, and everyone should go see it at least twice.
Personal information taken out due to Blog changes 7/2013
So yeah. That's what I've been up to. I'll post some about the adventures of my new warlock, my endeavors at getting a new flying mount on Phwoosh, any other new recipes I have tried and haven't posted (can't think of any, though), and hopefully some crafts when we get a little more settled in.
It's good to be back,
Anny
Wednesday, May 11, 2011
From the Kitchen : Beer Bread
I've been promising to post this for a month now, and I'm sorry it's taken so long. Beer Bread is wonderful and so easy to make, and needs to be shared with the world. Before you ask, yes you can give it to you children. All the alcohol cooks out and leaves behind a slightly beer-y taste. I don't like beer and I love this bread.
What you'll need:
3 cups flour, sifted*
3 teaspoons baking powder
1 teaspoon salt
1/4 cup sugar
1 1/2 cup beer of your choice
1/4 cup melted butter
What you'll do:
Mix everything together from flour to beer. If you want soft crust, mix in the butter, too. If you want a crusty bread, don't mix in the butter. After you pour the batter into a greased bread pan, pour the butter over it. Bake at 375 for one hour.
*The flour must be sifted! If not, your bread will come out very dense, and that's not what this bread is about.
See? That's all there is to it. You could make it even "easier" and mix it in the bread pan itself, though I found the process very messy and my bread wouldn't come out of the pan at all, hot or cool. Just a heads-up.
Well... It's 3:52 am here and I've got to get ready for work. Later today I'm making plastic bag ice cream with a friend. I'll let you know how that turns out. Maybe tomorrow. Oh! I also finished a shirt yesterday, and continued work on the Sarah dress. Invisible zipper, for the win!
-Anny
What you'll need:
3 cups flour, sifted*
3 teaspoons baking powder
1 teaspoon salt
1/4 cup sugar
1 1/2 cup beer of your choice
1/4 cup melted butter
What you'll do:
Mix everything together from flour to beer. If you want soft crust, mix in the butter, too. If you want a crusty bread, don't mix in the butter. After you pour the batter into a greased bread pan, pour the butter over it. Bake at 375 for one hour.
*The flour must be sifted! If not, your bread will come out very dense, and that's not what this bread is about.
See? That's all there is to it. You could make it even "easier" and mix it in the bread pan itself, though I found the process very messy and my bread wouldn't come out of the pan at all, hot or cool. Just a heads-up.
Well... It's 3:52 am here and I've got to get ready for work. Later today I'm making plastic bag ice cream with a friend. I'll let you know how that turns out. Maybe tomorrow. Oh! I also finished a shirt yesterday, and continued work on the Sarah dress. Invisible zipper, for the win!
-Anny
Monday, May 9, 2011
From the Kitchen: Cinnamon Sugar Heaven
Beer Bread will have to wait. I just made an amazing discovery called Cinnamon Sugar Pull-Apart Bread. I'm pretty sure it's almost gone, and it's not been out of the oven for fifteen minutes. Needless to say, Josh and Cowboy love it! (By the way, I have a new guinea pig. Remember that friend that returned?)
Here's a picture to entice you to make it:
 What you'll Need:
Dough
2 3/4 cups flour
1/4 cup sugar
1 packet yeast
1/2 teaspoon salt
4 Tablespoons butter
1/3 cup milk
1/4 cup water
2 eggs
1 teaspoon vanilla
Filling
1 cup sugar
2 teaspoons cinnamon
1/2 teaspoon nutmeg
4 Tablespoons butter, melted
What you'll do:
Mix together flour, sugar, yeast, and salt. Set aside. In a small saucepan, heat butter and milk just until butter is melted. While waiting for that, beat your two eggs. When the milky butter is ready, add to it the water and vanilla. Add that to the dry ingredients. When it's well mixed, add the eggs. It's going to seem like the eggs never mix in, but keep going. It'll work. The dough will be sticky. Transfer it to a greased plastic bowl, cover, and let it rise until doubled in size. It'll take about an hour.
While waiting for that, mix together the sugar, cinnamon, and nutmeg for the filling.
When your dough is doubled, kneed into it 2 Tablespoons of flour and then let it rest for five minutes. Roll it out to about 12''x20''. Cover it in the melted butter and then sprinkle the nutmeggy cinnamon sugar all over the place. It's going to seem like a lot. Just do it. Trust me. When that's done, resist the urge to eat it as-is. Instead, cut it into 6 equally sized strips and stack them on top of each other. Then cut that into six squares. Stack them in a bread pan, cover it up again, and let it rise for 45 minutes. ThenSet the Oven to Cataclysmic preheat the oven to 350 F and bake it for 30-35 minutes.
There's a reason I call it Cinnamon Sugar Heaven. You will understand.
Here's a picture to entice you to make it:

Dough
2 3/4 cups flour
1/4 cup sugar
1 packet yeast
1/2 teaspoon salt
4 Tablespoons butter
1/3 cup milk
1/4 cup water
2 eggs
1 teaspoon vanilla
Filling
1 cup sugar
2 teaspoons cinnamon
1/2 teaspoon nutmeg
4 Tablespoons butter, melted
What you'll do:
Mix together flour, sugar, yeast, and salt. Set aside. In a small saucepan, heat butter and milk just until butter is melted. While waiting for that, beat your two eggs. When the milky butter is ready, add to it the water and vanilla. Add that to the dry ingredients. When it's well mixed, add the eggs. It's going to seem like the eggs never mix in, but keep going. It'll work. The dough will be sticky. Transfer it to a greased plastic bowl, cover, and let it rise until doubled in size. It'll take about an hour.
While waiting for that, mix together the sugar, cinnamon, and nutmeg for the filling.
When your dough is doubled, kneed into it 2 Tablespoons of flour and then let it rest for five minutes. Roll it out to about 12''x20''. Cover it in the melted butter and then sprinkle the nutmeggy cinnamon sugar all over the place. It's going to seem like a lot. Just do it. Trust me. When that's done, resist the urge to eat it as-is. Instead, cut it into 6 equally sized strips and stack them on top of each other. Then cut that into six squares. Stack them in a bread pan, cover it up again, and let it rise for 45 minutes. Then
There's a reason I call it Cinnamon Sugar Heaven. You will understand.
Wednesday, April 13, 2011
From the Kitchen: Cheeseburger Helper
I made three awesome things in two days and couldn't decide which one to post. It turned out to be Cheeseburger Helper, just because it can be a complete meal if you want it to be. There's a story behind why I made this, too!
A friend was coming up to stay the night with us on Saturday night, and he said he'd bring his grill and make hamburgers. When he got here, he had most of his grill, but not the part that held the fire. Problem! Four pounds of ground beef (raised by him, too) all thawed, and no grill on which to cook it. He suggested going and getting some boxes of Hamburger Helper from the store, and I chastised him for it. Why buy the boxed crap full of preservatives and who-knows-what else when I can make the same thing for much less with stuff I have in my kitchen already? A quick search led me to an easy recipe for this, and it was easily doubled and fed me, my husband, and two friends. That's three guys and me.
Cheeseburger Helper
What you'll need:
1 Lb. ground beef
1 cup hot water
2 cups milk
1 1/2 cup macaroni noodles
1 Tablespoon cornstarch
2 teaspoons paprika
1 teaspoon onion powder
1 teaspoon garlic
1 teaspoon salt
1 teaspoon sugar
1 cup cheddar cheese
What you'll do:
Brown and drain the ground beef. Add everything except the cheese. Bring it to a boil, then cover, reduce heat, and simmer for nine minutes. Add the cheese, give it a good stir, cover it again, and simmer three minutes longer. Remove it from the heat, uncover it, and let it stand for five minutes. The sauce will thicken. Serve!
This makes enough to feed four as the main dish, and it's better than the stuff from the box.
-Anny
A friend was coming up to stay the night with us on Saturday night, and he said he'd bring his grill and make hamburgers. When he got here, he had most of his grill, but not the part that held the fire. Problem! Four pounds of ground beef (raised by him, too) all thawed, and no grill on which to cook it. He suggested going and getting some boxes of Hamburger Helper from the store, and I chastised him for it. Why buy the boxed crap full of preservatives and who-knows-what else when I can make the same thing for much less with stuff I have in my kitchen already? A quick search led me to an easy recipe for this, and it was easily doubled and fed me, my husband, and two friends. That's three guys and me.
Cheeseburger Helper
What you'll need:
1 Lb. ground beef
1 cup hot water
2 cups milk
1 1/2 cup macaroni noodles
1 Tablespoon cornstarch
2 teaspoons paprika
1 teaspoon onion powder
1 teaspoon garlic
1 teaspoon salt
1 teaspoon sugar
1 cup cheddar cheese
What you'll do:
Brown and drain the ground beef. Add everything except the cheese. Bring it to a boil, then cover, reduce heat, and simmer for nine minutes. Add the cheese, give it a good stir, cover it again, and simmer three minutes longer. Remove it from the heat, uncover it, and let it stand for five minutes. The sauce will thicken. Serve!
This makes enough to feed four as the main dish, and it's better than the stuff from the box.
-Anny
Friday, April 8, 2011
From the Kitchen: Chicken Noodle Soup... In a Crock Pot!
So, I worked a full 8 hours yesterday, and I really didn't want to be in the kitchen forever when I got home. Perfect time for a crock pot meal! Super easy, and one of the better things I've made in a while.
Crock Pot Chicken Noodle Soup
You will need:
2 boneless skinless chicken breasts, thawed
6-8 slices bacon, chopped up
3 medium potatoes, peeled and cubed
1/2 large onion, chopped
2 cloves garlic, minced
1 t. basil
1 t. black pepper
2 t. salt
1 T. olive oil
8 c. water
12 oz. egg noodles
What you'll do:
Toss everything except the noodles into the crock pot. Just throw it all in there as-is. Don't worry about chunking up the chicken yet. Put the lid on, turn it on high, and walk away for 4 hours. At the end of 4 hours, grab a metal spoon and chop the chicken up into bite-sized chunks while still in the pot. Add the egg noodles. Put the lid on, and cook for another hour.
Josh ate it with cheese on top, I ate it without. It was good both ways. Very, very flavorful. Very, very easy. I ran two heroics and did a bunch of other things while this was cooking and didn't even think about having something on in the kitchen, which was nice.
Crock Pot Chicken Noodle Soup
You will need:
2 boneless skinless chicken breasts, thawed
6-8 slices bacon, chopped up
3 medium potatoes, peeled and cubed
1/2 large onion, chopped
2 cloves garlic, minced
1 t. basil
1 t. black pepper
2 t. salt
1 T. olive oil
8 c. water
12 oz. egg noodles
What you'll do:
Toss everything except the noodles into the crock pot. Just throw it all in there as-is. Don't worry about chunking up the chicken yet. Put the lid on, turn it on high, and walk away for 4 hours. At the end of 4 hours, grab a metal spoon and chop the chicken up into bite-sized chunks while still in the pot. Add the egg noodles. Put the lid on, and cook for another hour.
Josh ate it with cheese on top, I ate it without. It was good both ways. Very, very flavorful. Very, very easy. I ran two heroics and did a bunch of other things while this was cooking and didn't even think about having something on in the kitchen, which was nice.
Wednesday, March 16, 2011
From the Kitchen: Fry Bread
Being born and raised in Oklahoma, Indian Tacos are an essential part of life. You can't go one summer without seeing at least one Indian Taco fundraiser. So, what are Indian Tacos? Other than amazing, they are chili, lettuce, tomato, cheese, and sour cream piled on top of fry bread. What's that last bit? I had some trouble explaining this to my husband. The closest I got was "Like a pita, but fried." That's not that close, really, but it's the closest I could get. It should be crispy on the outside and light and fluffy on the inside. Here's my recipe. It's fast, easy, saves well, and you can top it with honey or butter and cinnamon sugar or make breakfast tacos with eggs and sausage on top or something. My favorite's the one with honey.
Indian Fry Bread
You will need:
3 cups flour
1 Tablespoon baking powder
1/2 teaspoon salt
1 cup warm water
1/2 cup milk
vegetable oil for frying
Mix the flour, baking powder, and salt together. Add the water and milk and mix until it starts to ball up. Turn it out on a heavily floured surface, and with very floured hands, kneed lightly. If you kneed too long, it gets dense, and we're not going for that. Refrigerate it for thirty minutes. While it's chilling, pour about an inch and a half of vegetable oil into a cast iron skillet and heat it up to at least 350 degrees Fahrenheit. The hotter the oil, the faster it cooks. The faster it cooks, the crispier it will be on the outside and the lighter it will be on the inside. Divide the dough up into four equal portions. Again with the flour, flatten each ball out into a disk about 8 inches across. CAREFULLY (I use a wide spatula and a fork) slide one disk into your heated grease. Like frying anything else, this gets noisy and dangerous. Watch out for grease splatters. After about a minute, check the underside. If it's golden brown, flip your disk over. When the "top" is golden to match the "bottom," take it out. I put mine on a plate with paper towels to suck up some of the grease. Repeat for the other three disks, and you've got a wonderful base for an Indian Taco.
This recipe doubles nicely, too.
Indian Fry Bread
You will need:
3 cups flour
1 Tablespoon baking powder
1/2 teaspoon salt
1 cup warm water
1/2 cup milk
vegetable oil for frying
Mix the flour, baking powder, and salt together. Add the water and milk and mix until it starts to ball up. Turn it out on a heavily floured surface, and with very floured hands, kneed lightly. If you kneed too long, it gets dense, and we're not going for that. Refrigerate it for thirty minutes. While it's chilling, pour about an inch and a half of vegetable oil into a cast iron skillet and heat it up to at least 350 degrees Fahrenheit. The hotter the oil, the faster it cooks. The faster it cooks, the crispier it will be on the outside and the lighter it will be on the inside. Divide the dough up into four equal portions. Again with the flour, flatten each ball out into a disk about 8 inches across. CAREFULLY (I use a wide spatula and a fork) slide one disk into your heated grease. Like frying anything else, this gets noisy and dangerous. Watch out for grease splatters. After about a minute, check the underside. If it's golden brown, flip your disk over. When the "top" is golden to match the "bottom," take it out. I put mine on a plate with paper towels to suck up some of the grease. Repeat for the other three disks, and you've got a wonderful base for an Indian Taco.
This recipe doubles nicely, too.
Wednesday, March 9, 2011
From the Kitchen: Red Beans and Rice
I love this dish. It is amazing! If you want to make me happy, make me red beans and rice. WARNING: It does take a while. Quite a while. Up to 60 hours, really.
You Will Need:
1 pound red kidney beans
1 large onion, chopped
1 bell pepper, chopped
4-5 ribs celery, chopped
5-6 cloves garlic, minced
1 ham hock (or a slice of ham, diced)
1 pound smoked sausage, sliced diagonally
3/4 t. thyme
2 bay leaves
4-5 dashes Tabasco sauce
1 dash Worcestershire sauce
1 t Creole seasoning
Salt to taste
How to do it:
If you want, soak the beans overnight. Then drain them, cover with twice as much water as you have beans, bring them to be a rolling boil. Boil them for an hour. While they're happily bubbling away, work on the onion, bell pepper, celery, and garlic. Once they're chopped, saute them until the onions are translucent. Add the garlic and saute two minutes more. Drain the beans, put them back in the pot, and add everything else. Everything. From onion to salt. Bring it to a boil. Reduce the heat and simmer for 2 to (preferably) 3 hours. When it starts getting creamy, adjust the seasonings to your liking. Serve over rice. Or, cool it, refrigerate it overnight, reheat it, and serve it for dinner the next day. It's even better, trust me.
You Will Need:
1 pound red kidney beans
1 large onion, chopped
1 bell pepper, chopped
4-5 ribs celery, chopped
5-6 cloves garlic, minced
1 ham hock (or a slice of ham, diced)
1 pound smoked sausage, sliced diagonally
3/4 t. thyme
2 bay leaves
4-5 dashes Tabasco sauce
1 dash Worcestershire sauce
1 t Creole seasoning
Salt to taste
How to do it:
If you want, soak the beans overnight. Then drain them, cover with twice as much water as you have beans, bring them to be a rolling boil. Boil them for an hour. While they're happily bubbling away, work on the onion, bell pepper, celery, and garlic. Once they're chopped, saute them until the onions are translucent. Add the garlic and saute two minutes more. Drain the beans, put them back in the pot, and add everything else. Everything. From onion to salt. Bring it to a boil. Reduce the heat and simmer for 2 to (preferably) 3 hours. When it starts getting creamy, adjust the seasonings to your liking. Serve over rice. Or, cool it, refrigerate it overnight, reheat it, and serve it for dinner the next day. It's even better, trust me.
Wednesday, March 2, 2011
From the Kitchen: Irish Soda Bread
I guess this counts as a quick bread since it doesn't need to rise at all. It's really good and takes about an hour from start to finish. You can swirl in some other stuff like garlic or cinnamon sugar, too, making it really versatile. When I made it pre-marriage, my sister would eat it all before anyone else got a chance. Now, as with all bread I make, my husband devours it in all of about thirty minutes. He especially likes the garlic version.
You Will Need:
2 cups buttermilk (or 2 T lemon juice topped off to two cups and left for 5 minutes)
4 cups flour
1 teaspoon salt
1 teaspoon baking soda
Preheat the oven to 425 F.
Sift together (or mix well with fork) flour, salt, and soda. If you want, add 1 T granulated garlic, dill, or whatever. Add the buttermilk and mix well. Turn out onto a floured surface and kneed until smooth. Grease two round cake pans. Place the lump in one and cover it with the other. Bake for thirty minutes. Remove the top cake pan. Bake for fifteen minutes more. Remove and turn out onto a plate. Cover with a towel and sprinkle with water.
Ta da! You've just made the second most wonderful bread in the world, next to French bread.
You Will Need:
2 cups buttermilk (or 2 T lemon juice topped off to two cups and left for 5 minutes)
4 cups flour
1 teaspoon salt
1 teaspoon baking soda
Preheat the oven to 425 F.
Sift together (or mix well with fork) flour, salt, and soda. If you want, add 1 T granulated garlic, dill, or whatever. Add the buttermilk and mix well. Turn out onto a floured surface and kneed until smooth. Grease two round cake pans. Place the lump in one and cover it with the other. Bake for thirty minutes. Remove the top cake pan. Bake for fifteen minutes more. Remove and turn out onto a plate. Cover with a towel and sprinkle with water.
Ta da! You've just made the second most wonderful bread in the world, next to French bread.
Wednesday, February 23, 2011
From The Kitchen: Garlic Roasted Potatoes
Garlic Roasted potatoes are shaped like potato wedges, which I generally don't like. I can't get enough of these, though, and neither can Josh. Aside from the chopping and mincing (I don't have a garlic mincer), they take no time at all. They're a great way to get rid of potatoes that are about to go bad. I bet some whole garlic cloves would go awesome in this, too...
4-5 potatoes, cut into wedges about 1/2'' thick at the top
3 T olive oil
4+ cloves garlic, minced
1 t herb of choice
1 t salt
1/2 t pepper
Preheat oven to 450 F. Toss everything together in a bowl or put it in a container with a lid and shake it. Spread it on a cookie sheet. Bake 12 to 15 minutes. Flip the potatoes over. Bake for 10 more minutes. Serve with or without ranch dressing.
There will be some leftover oil stuff in the bottom of your bowl (if you didn't pour it over the potatoes before you baked them). Wipe it out with a slice of bread and eat it. Seriously. It might be more awesome than the potatoes themselves.
Notes:
4+ cloves garlic - It depends on the size of the cloves. Make them big ones!
1 t herb - I use basil, since it's my favorite herb and it goes well with garlic and olive oil.
1 t salt - Normal salt is fine, but I like sea salt on them. So does Josh.
4-5 potatoes, cut into wedges about 1/2'' thick at the top
3 T olive oil
4+ cloves garlic, minced
1 t herb of choice
1 t salt
1/2 t pepper
Preheat oven to 450 F. Toss everything together in a bowl or put it in a container with a lid and shake it. Spread it on a cookie sheet. Bake 12 to 15 minutes. Flip the potatoes over. Bake for 10 more minutes. Serve with or without ranch dressing.
There will be some leftover oil stuff in the bottom of your bowl (if you didn't pour it over the potatoes before you baked them). Wipe it out with a slice of bread and eat it. Seriously. It might be more awesome than the potatoes themselves.
Notes:
4+ cloves garlic - It depends on the size of the cloves. Make them big ones!
1 t herb - I use basil, since it's my favorite herb and it goes well with garlic and olive oil.
1 t salt - Normal salt is fine, but I like sea salt on them. So does Josh.
Wednesday, February 16, 2011
From the Kitchen: Pork Chow Mein
This is ridiculously easy, super-cheap, stupid fast, and so good you won't have leftovers. Josh loves it, which is always a bonus. Just make sure you have everything prepared and within reach when you start cooking. You can't stop with stir-fry. If you need to, grab a helper to hand you things.
You will need:
2 pork chops, sliced into 1/4'' strips
2 cloves garlic, minced
4 T soy sauce, divided
2 T cornstarch
1/2 to 1 t. ground ginger
1 cup chicken broth (I use bullion and it turns out fine)
1 T vegetable oil (NOT Olive oil*)
2 carrots, sliced
2 stalks celery, sliced (optional)
1 cup chopped onion
Hot cooked rice
What you do:
1. Put your pork strips, garlic, and 2 Tablespoons of the soy sauce in a bowl. Cover it and put it in the fridge for 2 hours. This is a good time to chop everything up.
2. When it gets close to time to pull the meat out of the fridge, combine cornstarch, ginger, broth, and remaining soy sauce.
3. Start cooking the rice.
4. In a wok or large frying pan, coat the bottom and sides with vegetable oil. Turn on the heat. It needs to be pretty high. Yes, it will smell like you're burning things when stuff starts going in, and there will be smoke. Don't worry. It's ok. Just turn on the vent hood.
5. As soon as the oil in the pan starts smoking, dump in the pork mess. Stir like crazy until the meat is no longer pink. Remove it from the pan.
6. Throw the carrots and celery (if used) in the pan. Stir like crazy for 3-4 minutes.
7. Add the onions. Stir like crazy for 2-3 minutes.
8. Give the broth mess a good stir; the cornstarch will settle to the bottom if you don't and this isn't good when you try to pour it in. Pour it in along with the pork.
9. Stir like crazy until everything is coated and sauce begins to thicken. This will take 3-4 minutes.
10. Serve immediately over rice.
* Olive oil has a lower smoke-point than vegetable oil. This means that it smokes at a lower temperature, which isn't good. You need a really hot pan to make stir-fry work right. It's also important to have your pan hot when you add your first ingredient. It flash-cooks the food and seals in the flavor better.
-Anny
You will need:
2 pork chops, sliced into 1/4'' strips
2 cloves garlic, minced
4 T soy sauce, divided
2 T cornstarch
1/2 to 1 t. ground ginger
1 cup chicken broth (I use bullion and it turns out fine)
1 T vegetable oil (NOT Olive oil*)
2 carrots, sliced
2 stalks celery, sliced (optional)
1 cup chopped onion
Hot cooked rice
What you do:
1. Put your pork strips, garlic, and 2 Tablespoons of the soy sauce in a bowl. Cover it and put it in the fridge for 2 hours. This is a good time to chop everything up.
2. When it gets close to time to pull the meat out of the fridge, combine cornstarch, ginger, broth, and remaining soy sauce.
3. Start cooking the rice.
4. In a wok or large frying pan, coat the bottom and sides with vegetable oil. Turn on the heat. It needs to be pretty high. Yes, it will smell like you're burning things when stuff starts going in, and there will be smoke. Don't worry. It's ok. Just turn on the vent hood.
5. As soon as the oil in the pan starts smoking, dump in the pork mess. Stir like crazy until the meat is no longer pink. Remove it from the pan.
6. Throw the carrots and celery (if used) in the pan. Stir like crazy for 3-4 minutes.
7. Add the onions. Stir like crazy for 2-3 minutes.
8. Give the broth mess a good stir; the cornstarch will settle to the bottom if you don't and this isn't good when you try to pour it in. Pour it in along with the pork.
9. Stir like crazy until everything is coated and sauce begins to thicken. This will take 3-4 minutes.
10. Serve immediately over rice.
* Olive oil has a lower smoke-point than vegetable oil. This means that it smokes at a lower temperature, which isn't good. You need a really hot pan to make stir-fry work right. It's also important to have your pan hot when you add your first ingredient. It flash-cooks the food and seals in the flavor better.
-Anny
Wednesday, February 9, 2011
From the Kitchen: Rolls
I love these things, and despite being yeast rolls, they're easy and pretty quick, too. They were originally supposed to be hamburger buns, and I've used them for that, but they make a pretty good breakfast if you warm them up and slather them with some butter or drizzle them with honey (my favorite!). I've also successfully stuffed them with some meaty stuff and baked them with amazing results. So, without any further ado, here it is:
Hamburger Bun Roll Things
1 cup milk
1/2 cup water
4 Tablespoons butter
4 1/2 cups flour, divided
1 package yeast (.25 oz)
2 Tablespoons sugar
1 1/2 teaspoons salt
1 egg
1. Put the milk, water, and butter in a bowl. Heat in the microwave for 2 minutes.
2. Mix 1 3/4 cups flower with yeast, sugar, and salt.
3. Add the milk mess and the egg and mix well.
4. Add as much of the rest of the flour, 1/2 cup at a time, as the dough will take.
5. Turn it out on a floured surface and kneed for about 5 minutes.
6. Divide the heavenly-smelling wad of dough into 8 smaller wads of dough.
7. Roll them into balls, place them on a cookie sheet, and flatten slightly.
8. Cover and let rise 30 minutes. While that's going, preheat the oven to 400F.
9. Bake 10-12 minutes.
10. Cut in half and serve as hamburger buns, or slather them with butter and jelly as breakfast, or whatever. These are incredibly versatile.
Meat filled:
Follow directions to step 6. Roll them into balls and flatten in your hand. Flatten quite a bit. Spoon some of your meat mixture (I used 3/4 lb ground beef with 1/4 lb sausage, some onion, and garlic, already all cooked) onto the flattened dough wad and fold the edges up around the filling. Seal it off, round it out, and put it on your cookie sheet. Repeat for the remaining 7 and bake as directed above. They look just like regular roll things but have a yummy surprise waiting inside, and they're much more filling.
Get addicted to these. It's not hard. They're so good! I think I've had the recipe for 2 weeks and I've made them at least 3 times. Four if you count the meat-filled ones.
Until next time,
Anny
Hamburger Bun Roll Things
1 cup milk
1/2 cup water
4 Tablespoons butter
4 1/2 cups flour, divided
1 package yeast (.25 oz)
2 Tablespoons sugar
1 1/2 teaspoons salt
1 egg
1. Put the milk, water, and butter in a bowl. Heat in the microwave for 2 minutes.
2. Mix 1 3/4 cups flower with yeast, sugar, and salt.
3. Add the milk mess and the egg and mix well.
4. Add as much of the rest of the flour, 1/2 cup at a time, as the dough will take.
5. Turn it out on a floured surface and kneed for about 5 minutes.
6. Divide the heavenly-smelling wad of dough into 8 smaller wads of dough.
7. Roll them into balls, place them on a cookie sheet, and flatten slightly.
8. Cover and let rise 30 minutes. While that's going, preheat the oven to 400F.
9. Bake 10-12 minutes.
10. Cut in half and serve as hamburger buns, or slather them with butter and jelly as breakfast, or whatever. These are incredibly versatile.
Meat filled:
Follow directions to step 6. Roll them into balls and flatten in your hand. Flatten quite a bit. Spoon some of your meat mixture (I used 3/4 lb ground beef with 1/4 lb sausage, some onion, and garlic, already all cooked) onto the flattened dough wad and fold the edges up around the filling. Seal it off, round it out, and put it on your cookie sheet. Repeat for the remaining 7 and bake as directed above. They look just like regular roll things but have a yummy surprise waiting inside, and they're much more filling.
Get addicted to these. It's not hard. They're so good! I think I've had the recipe for 2 weeks and I've made them at least 3 times. Four if you count the meat-filled ones.
Until next time,
Anny
Subscribe to:
Posts (Atom)