Showing posts with label clothes. Show all posts

Wednesday, July 9, 2014

Project - Saki Morimi of Eden of the East

Greetings, one and all! I promised some pictures of projects, and here's one I finished today. My sister is going to Tokyo in Tulsa this year and has asked for a Saki Morimi dress from Eden of the East: The King of Eden. Of course, I had to go and watch the entire show and both movies, but it was well worth it. Excellent series, I highly recommend it.

And here it is! Well, 3-ish photos. I didn't take any of the drafting process...

This was about 1 "day" of work. I watched some TV, ate some watermelon...
Generally just a lot of goofing off.

Jayne has decided that this dress is his, not Sister's.

Fully assembled, necklace included.

Fabric covered buttons, bias tape, band, gathering...

Ruffle detail. I. Hate. Ruffles.
Overall, from start to finish, I'd say this project took about 8 hours. The fabric is just some cheap broadcloth from Hobby Lobby: 2.5 yards of pink, .5 yards of white. I'll make sure she gets some pictures in this one for me so I can show off the product while she's wearing all of it.

Monday, July 8, 2013

I've Tried That: Brine Your T-Shirts

Here starts the first post in a series: Things I've Tried from Pinterest. This week, you get one that actually works! Brine your T-shirts to make them super-soft without having to wear them for years first.

What you'll do:

Dissolve 1/2 cup salt in 4 cups of water.
Soak your shirt for 3 to 4 days, stirring occasionally.
Toss it in the washing machine with a little detergent.
Tumble dry.
 Enjoy your brand new T-shirt that feels vintage soft.

So, how did it work?

Remarkably well, actually.

I got a plain brown T-shirt from Michael's on one of their sales, soaked it in a bucket with salty water for 4 days, and then deviated from the instructions. I didn't have easy access to a washer (living in an apartment without hookups, laundry mat every week), so I washed it in the sink and let it air dry. DO NOT DO THAT! It came out scratchy and stiff. I gave it up as a lost cause and tossed it in the pile to wash. After laundry day, as I was folding all the clothes, I came across a brown T-shirt that looked brand new but felt super worn. Then it clicked: the experiment worked! Now when I get new shirts, I dig out a bucket and brine them all.

Have you tried it? Did it work for you? Let me know in the comments.

Phwoosh


Resources:
OctaneShop.com

Monday, December 5, 2011

Christmas Dress, Circle Skirt, and Cape

So, no picnic dress yet. I still have to finish that, and in order to finish that I have to finish Christmas presents. But... I have my most recent 4 projects in photo form! And without any further ado, here they are:

This is a full circle skirt I made out of some old polyester double-knit that my mom's friend gave to me. It started as a way to add some color to my Sunday wardrobe since said wardrobe is full of black, white, and brown.

The next image is another attempt to add some color to my wardrobe. It also came about as practice for another dress I want to make. Made of homespun cotton, this plaid dress was probably more of a challenge than the lace dress. The Christmas Dress was my first foray into the world of plaids. Of course, I couldn't help modifying it. The black band is a strip of bias tape that I added for an accent.
So we're moving from brown, black, and white
to brown, black, white, and red...
It's SUPER-PLAID! Flowing from red to red plaid to purple plaid, we have my new source of warmth for the spring and fall seasons. This whole project just sort of cobbled itself together. I was originally going to make it out of the red plaid above, but while at Hobby Lobby one day... Well, it was on sale! How could I resist? Three dollars a yard for the soft, warm purply-ness... The lining is some sort of satin stuff that I found at a church sale. It's amazing, too. And, as with the plaid dress, I had to modify. The original pattern called for thicker fabric, a ton of bias tape, and no lining. I nixed the tape, added a lining, and made the whole thing a little more light.

And that's all in the way of clothing. I still have to finish a vest for a friend, my nightgown (that lacks only embroidery and ties in the back), and the ever-incomplete picnic dress. But wait! Don't run away just yet. I still have to show you my grandmother's Christmas present!
It's still a work in progress, though I have four more rows woven and pinned and ready to sew than what you see here. I found this wonderful tutorial over at The Moda Bake Shop, and since I had the jelly roll, I couldn't resist. I know Gumby will love it. How do I know this? I know this because I love it and I don't want to give it up!

That's all for today. Soon I shall have ornaments to show off and a completed rug and maybe even some recipes up. For now, I need to clean my kitchen and figure out something for dinner and get up enough courage to mess with my glue so I can make my sister's Christmas present.

Until next time!

Phwoosh

P.S. I now have a Pinterest account. When I get more pins, I'll throw up a link and you can come check it out.

Tuesday, August 2, 2011

From the Kitchen: Sauteed Summer Vegetables

It's summertime, which means that vegetables are coming up. Oh, man are they coming up. Probably not here, but the local Wal-Mart has some good ones from somewhere right now. Josh and I went to pick up some sandwich stuff and came home with a bag full of yummies. Squash, a tomato, some green beans, a few onions... And all of it went into my latest creation. This one's all me, too.

You will need:

1 small onion, sliced
1 T olive oil
1 medium squash, cubed
1 clove garlic, minced
1 handful green beans, cut into 1" segments
1 tomato, gutted and cubed
1/4 teaspoon basil
1/4 teaspoon salt
1/8 teaspoon pepper

What you'll do:

Saute the onions in the olive oil until they're tender. Add everything else, lower the heat, and simmer until the vegetables are tender, too.

Makes 2 servings

Yeah. It's that easy. I'm thinking about eating the second serving right now, to be honest. Sooooo good! Next time I make some I'll throw up a picture, 'cause it's pretty too. All the color!

I'll also put up pictures of the Karen Bag. They're still on my camera, right before the pictures of the fire that I've already thrown up. And maybe I'll get some pictures of my new house dress!

So my parents came to visit on Friday and my mom brought a bag of trims with her for me. As she carried it in, I saw a wad of orange fabric on top. And not just any orange; burnt orange. I. Hate. Burnt. Orange. Turns out it was a dress with some gaudy embroidery all over the front and it's shaped like a potato sack. There were ties in the back, though, so that wasn't so bad. I put it on the next morning. Keep in mind: Orange, potato sack, gaudy embroidery. Add to that list: too short to wear beyond the front door. This shapeless thing has nothing going for it! At all! I'm making another.

That's right, I've completely lost my mind. I love it! I'm wearing the orange one right now. And eventually I'm going to make a How to Recreate a Shapeless Garment thing and put it here, too.

The new one is, of course, purple. Instead of the tacky trim around the bottom but not the hem, I chose some black crocheted lace and used that around the hem. One one of the front corners (there's also scandalously high slits =P) I'm embroidering some cogs and a cool steampunk-y swirly thing, compliments of Urban Threads.

Personal information taken out due to Blog changes 7/2013

I started playing Minecraft. It's super-addictive until you get your house the way you want it and landscape your yard to perfection. Then it's boring. I got bored, which means that I spent a week mining for stuff and finding stuff and building a small castle and some waterfalls. All done. I'm actually a little bored with games. Am looking forward to Skyrim, though. Skyrim is the latest in the Elder Scrolls game line. While I missed out on Oblivion, I'm super-excited for Skyrim. Morrowind was just too amazing and I wish I could find my copy so I could get sucked back into that.

Games, food, sewing, jobs... I think I've covered everything! And now it's off to bed, off to bed...

-Anny

Friday, March 4, 2011

The Sarah Dress

Hello, new followers! It made my day to see your names on my Following list. It really did.

On to the post! This is for my sister, Sarah. I changed some numbers in the Princess Seam Bodice Generator and then didn't make a new pattern to fit myself... So the dress won't fit me. Rawr.


It's made out of an old skirt I bought while out with my mom five or six years ago. We were looking for something I could cut up and make into a fairy outfit. This wasn't used. I just cut the bottom of the skirt off at about the length I wanted it to be and used the cut-off part to make the bodice. I'll make straps and ties for it out of that, too.

It's fully lined and will have a zipper in the back.

Here's a detail of the waist, where I attached the made-by-me bodice and the ready-made skirt:


To do this, all I did was line up the bodice seams with the pleats in the skirt, put the blue right sides together, the lining right sides together (to make a big fabric sandwich), and sew it all around.

I'm waiting for light blue thread to finish it, since I can't very well do anything without it at this point. My husband and I are mostly out of the hole now, though, so I should be able to get that, no problem!

I'll post the completed dress when I can get it on Sarah and make sure it fits. Then there will be action shots of her in her new dress with her awesome hair.

There might be a late update tomorrow since I got to go see Megamind and Deathly Hallows again the other night. If not... Well... I'll see you Monday!

Friday, February 18, 2011

Bleach Dying Fabric

I had a blast the other day with a length of purple silky fabric, a dish of bleach, and an empty paper towel tube. My result turned into a dress that I can't wait to have an excuse to wear. And the best part: The bleaching and the sewing all happened in one day! And half of that while I was on the phone, to boot. So, do you want to learn what I learned? Ok, then!

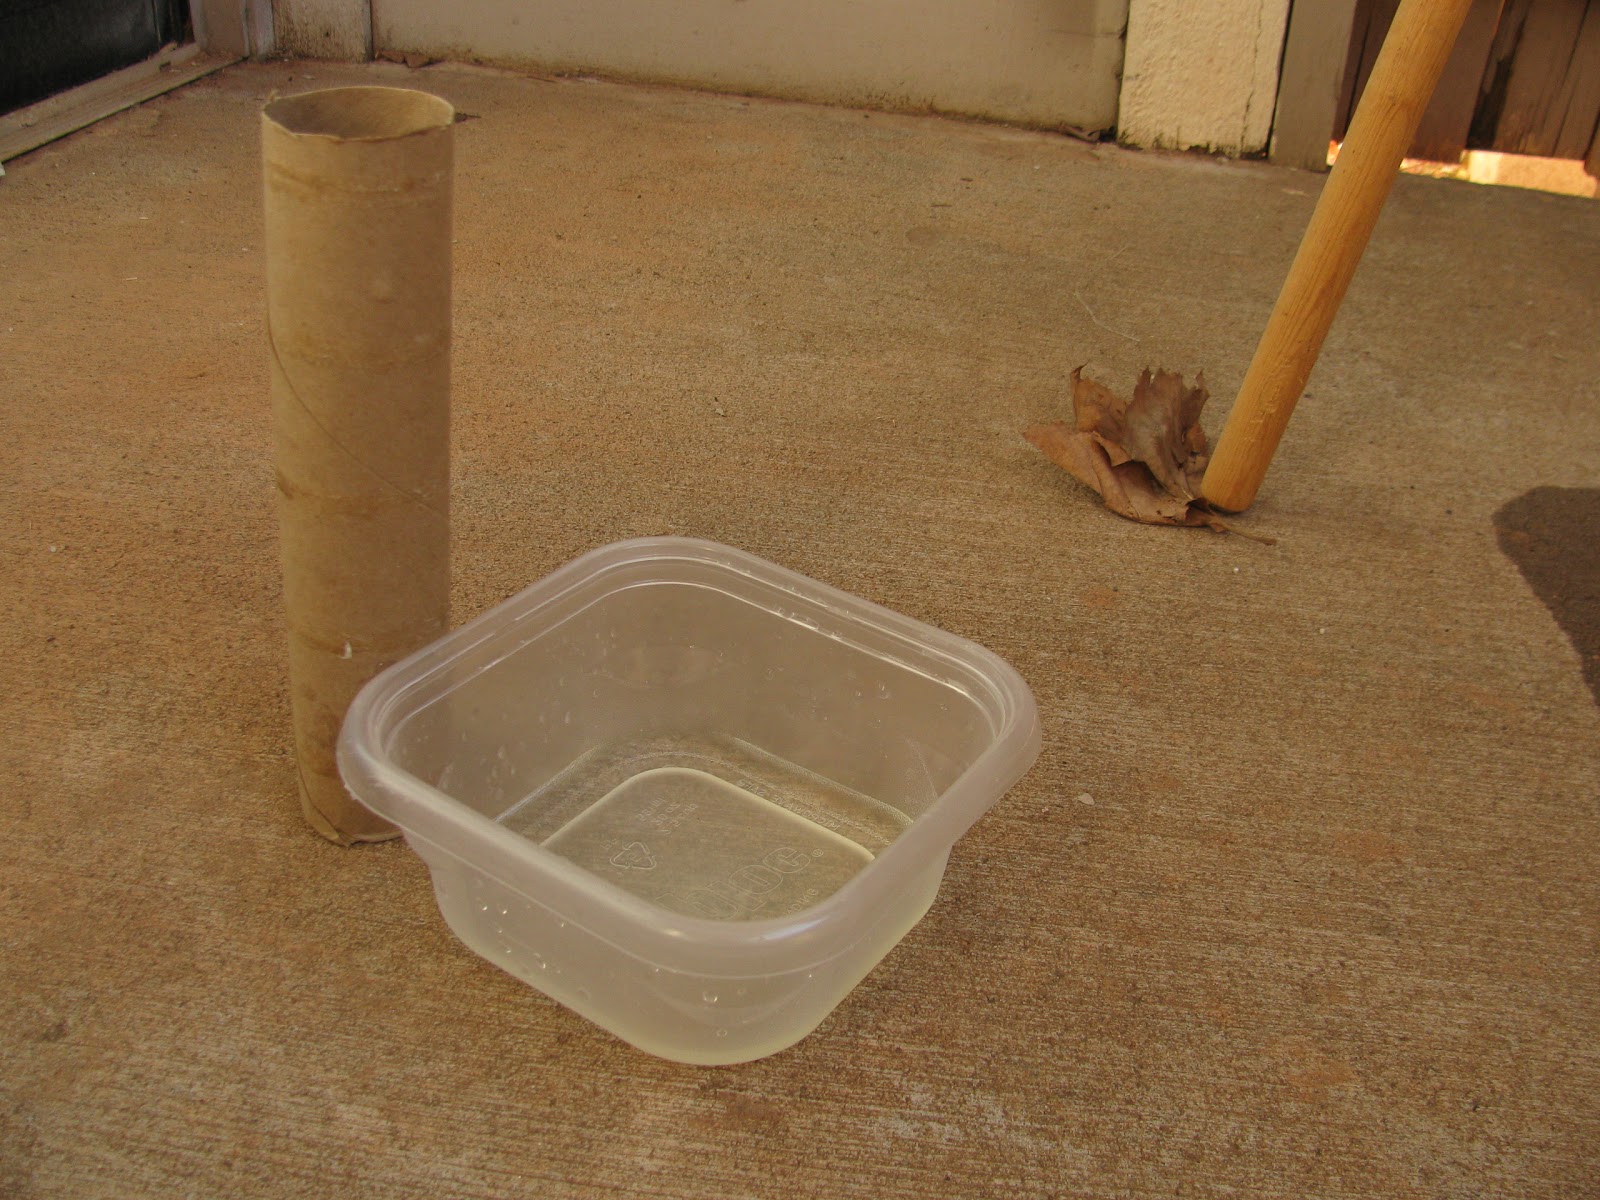
You will need:
- Fabric suitable for dying. This means not silk.
- Old clothes that you don't care about. I didn't do this because I was to excited, but you should.
- Somewhere outside. DON'T DO THIS INSIDE! I still smell bleach and it's giving me a headache.
- Something to apply the bleach to the fabric. Paper towel tube, paint brush, eye dropper thingy, spray bottle...
- A bucket of water.
- A dish of bleach. Normal Clorox will be fine.

Here's the bleach and the object I used to put the bleach on the fabric with. I didn't need that much bleach at all, since I was putting so little on my fabric.

A scrap of the fabric I used. I'm not sure what kind it is, but it bleached just fine. I read that natural fibers work best, but that bleach weakens silk fibers. So, stay away from polyester and silk and you should be fine.

The picture is tilted, but it gets the point across. Dip your applicator in the bleach and let it soak up a good deal of the stuff.


This one's tilted too, bit again, it gets the point across. Apply your bleach.


Make sure your bleach really gets into the fabric. Apply as much as you think you need to. Then wait. The time will vary depending on your fabric and how much you put on, etc. I waited between three and five minutes.


Rinse it out really well.

Hang it up to dry. See the spot where the circles aren't very dark? If that happens to you, wait until it's dry to go back and re-bleach it. Yeah, you'll have to wait for it to dry again, but that's better than the bleach spreading due to the water and making blurry marks... Which is what happened to me.


When it's dry, turn it into something awesome. I cheated on this dress in a couple of ways. The bottom isn't hemmed... That's the selvage. It doesn't look much like selvage, so I figured it would be fine. And it was. I also put the bottom elastic too far down, and rather than just take off the tape and re-sew it, I folded the inside and stitched really close to the tape, trimmed the extra off the fold, and zig-zag stitched the raw edges. You can't even tell!


Links I used:
Dying With Bleach - This is the site I primarily used for the bleach dying. There were some other sites that I googled, but I can't find them now.
Ruched Empire Dress - This is the site that gave me the idea for the dress. Check it out. There's some awesome stuff here.

It's looking like I'm not blogging tomorrow. Haven't finished reading The Two Towers, and haven't seen any new movies.

-Anny

Thursday, February 17, 2011

Links - Free Patterns!

I am always drawn in by the promise of free patterns. Always. I've also found a couple awesome pages for my two favorite periods of costume: Renaissance and Victorian Era.

The first link I'll give you is for DawnPages. I found this site a long time ago, and then lost it again. It recently popped back up in a list of free pattern sites that I found, and now I'm going to share it with whoever's reading. These are primarily Renaissance styles that could be found all over Europe at one point or another, so says the webmistress and I'll believe her. They're easy to follow, and they look good too.
DawnPages
Not only does she give free "patterns," but also her thoughts on good and bad costuming. It's a pretty awesome read. If you're a quilter, go check out her blog.

DawnPages seems to be down right now. Maybe she's putting up the pictures of the Lord of the Rings costumes she got to see and touch and take pictures of...

Another site I'm sharing today is for Victorian and Edwardian clothing. They're the original pieces and instructions put on the webz. I find it a rather frustrating site because I like being told how to do things... or given an easy enough pattern that I don't need instructions. This site doesn't do that. The patterns were made for ladies who had grown up sewing and needed no instruction on how to follow the patterns.
The Ladies Treasury of Costume and Fashion
One day I will figure out one of these and I will show the world!

Today you get three links! This last one is to a pretty good site called Burda Style. What? You've never heard of it? Ok. There are free patterns there and not free patterns there. Most of the not free ones are found in Burda Style Magazine, and you have to pay for them. The favored price now is $5.40. The link I'm giving you will show all the free patterns, since that's what this blog is about.
Burda Style
Yes, it requires an account. It takes less than five minutes to set up and it's 100% free, and then you get wonderful, awesome patterns right out of your printer. I made a dress from this site and I love it! There are also a hundred other things I want to make but don't have the time or fabric for.

That concludes the Sharing of the Links for today. Tomorrow you get a double feature... A tutorial and a showing off! I can't wait!!

-Anny